Saturday, June 22, 2024

Qlik Sense Financial Reporting Extension

 Post Index  

2024-06-22


Qlik Sense Financial Reporting Extension

Customizing Table for Reporting Purpose

Using Qlik Sense Extension to customize Standard Report Layout


----------------------------------------------------------------------------------------------------------

Side Track

It was some time ago that I posted articles into different communities.   Now, I am trying to consolidate back all of my shared articles into my blog for easy reference.  Also, I will also review a bit of them and see if any new information to supplement.   As time goes, everything keeps changing.  In particular to technology, in most of the time, we can see a lot of old stuff to be depreciated and come with new ideas, tools, etc.  Let's ride on them and move forward!  Let's stay tuned and updated!

----------------------------------------------------------------------------------------------------------


Qlik Sense Financial Reporting Extension

This extension is my first Qlik Sense extension.  It was, in fact, previously achieved the same using QlikView.  Due to the wave to migrate QV to QS, the method done in QV is no longer possible to be applied in QS.  The only way is to make an extension to do it.

At first, I tried this because of curiosity.  However, later I found it very useful because it let me to have a deeper knowledge in QS and also got more familiar a lot of things in QS that were behind the scene.  Now, I revisit the post and share it again.  I do not think it is good to share the extension because it is a bit out of date and I don't see a big demand in using this (at least, not many people approach me and ask about this recent years).   Below is the original post.

https://community.qlik.com/t5/Integration-Extension-APIs/Financial-Reporting-Extension/m-p/1952079


Below is the content of the original post for reference.

=======================================================================

Financial Reporting Extension

Topic

Financial reports is actually a table with specific format. And each of the line is calculated from some accounts with some specific attribute filters. In QlikView, the frontend requirement is able to be achieved by customizing the straight table. And backend, it is also able to be achieved by associating the right amount to each of the reporting line. However, in Qlik Sense, because of its simplicity, it is no longer available. It is impossible to customize the table like cell border, font bold, font size, etc. While the world is migrating QlikView to Qlik Sense, it is still necessary for financial reporting.

Therefore, the only way to achieve this is to make use an extension to allow the reporting customization. The backend is still can still be the same to make use of the association.

Financial Reporting

Very Simple Sample

financial.png

Settings Sample 1

header.png

Settings Sample 2

cell.png


Keep Connected

Drop me a message for discussion and sharing if you find this interesting and useful.

=======================================================================


Qlik Sense Extension

Before ending this post, I would like to highlight a bit on using Qlik Sense Extension.  Extension is handy and easy to use and apply but in general, it is risky.   One typical issue is that it might be incompatible in future releases and often, it would not get an upgrade.  Also maintaining an extension is time-consuming.  Whenever there is a patch release or new version, regression test is needed.   Unless the extension is highly dependent, otherwise, it would not get enough resources to support it.   Being said, extension is still good to apply because the basic charts cannot offer.  In short, I would recommend you to try the basic charts, customize the basic charts first before thinking of an extension solution.


By the way, my extension is not the same the PNL table from Qlik Visualization bundle.  It is actually a free style HTML table allow you to customize each line.  Definitely, it requires a QS model to maximize its usage.  I will try to cover more about this later as the generic model design should be shared and learnt.


Thank you for reading.  I hope it help you.  Just leave a message if you have any discussion/share want to make.

Saturday, June 15, 2024

Qlik SaaS Audit Log Application

 Post Index  

2024-06-15


Qlik SaaS Audit Log Application

Monitoring Qlik SaaS

Consolidating the logs information for easy tracking and tracing


----------------------------------------------------------------------------------------------------------

Side Track

It was some time ago that I posted articles into different communities.   Now, I am trying to consolidate back all of my shared articles into my blog for easy reference.  Also, I will also review a bit of them and see if any new information to supplement.   As time goes, everything keeps changing.  In particular to technology, in most of the time, we can see a lot of old stuff to be depreciated and come with new ideas, tools, etc.  Let's ride on them and move forward!  Let's stay tuned and updated!

----------------------------------------------------------------------------------------------------------


Qlik SaaS Audit Log Application

Back to this post content, "Qlik SaaS Audit Log Application" is one of my first few community posts in my life.  The post has been, in fact, posted for already two years.  Suddenly one day, I got a reply and a message to ask for the application.   I revisit the post as well as the application and decide to take some time to clean up and share the application.  The concepts and roughly the ideas how to implement the application can be found in the original post below.

https://community.qlik.com/t5/Qlik-Cloud-Data-Integration/Qlik-SaaS-Audit-Logs-Application/m-p/1941012

Below is the content of the original post for reference.

=======================================================================

Qlik SaaS Audit Logs Application

Topic
In Qlik SaaS, there is very limited event information you can find through the management console. The only way to get the full picture of logging is to call API (i.e. GET /audits/archive) to capture the relevant information. The information returned depends on what logs are available and it might take a while to understand and to parse the information.  Some data transformation is needed to make the information meaningful and visible.

I have tried to create a Qlik Sense application that calls the API and transform all information into a single data model.

audit_log.png


Qlik SaaS Aduit Logs Application
The below information has been extracted:
- User Log
- Space Log
- Space Assignment Log
- User Session
- App Reload
- App Load
- App Table Export Log
- App Export Log
- App Object Log
- App Publish Log
- App Data Updated Log
- License Assignment Log

archive.png

example.png

Keep Connected
Drop me a message for discussion and sharing if you find this interesting and useful.


=======================================================================


Github Share Link


The Qlik SaaS Audit Application is now placed in my github.  If you are interested, you can find in

https://github.com/kongson-cheung/qlik-saas-application/blob/a5d19c8cdcf7732357ef3aeac6313f351c79885e/Qlik%20SaaS%20Audit%20Logs%20(template%20developed%20by%20Dr.%20Kongson%20Cheung).qvf


Thank you for reading.  I hope it help you.  Just leave a message if you have any discussion/share want to make.


Monday, June 10, 2024

Alteryx - Triggering Qlik Sense Task

Post Index  

2024-06-10


Alteryx - Triggering Qlik Sense Task

QS Reload Tool to CURL API Call

Integrating Alteryx and Qlik Sense


----------------------------------------------------------------------------------------------------------

Side Track

It was some time ago that I posted articles into different communities.   Now, I am trying to consolidate back all of my shared articles into my blog for easy reference.  Also, I will also review a bit of them and see if any new information to supplement.   As time goes, everything keeps changing.  In particular to technology, in most of the time, we can see a lot of old stuff to be depreciated and come with new ideas, tools, etc.  Let's ride on them and move forward!  Let's stay tuned and updated!

----------------------------------------------------------------------------------------------------------


Alteryx to Reload QS Task

Back to this post content, "Alteryx - Qlik Sense Reload Tool" is one of my first community posts in my life.  And previously, I only share concepts and roughly the ideas how to implement.  I would now try best also to share as much as I can.  You might find the original post below.

https://community.alteryx.com/t5/Alteryx-Designer-Desktop-Discussions/Alteryx-Qlik-Sense-Reload-Tool/td-p/939218

Unfortunately, the tool was developed using .NET SDK which is no longer supported by Alteryx (as of 2024-06-10) and therefore, it cannot be used anymore.  Nonetheless,  it is easy to replicate the details using CURL.  I will share more information at the end of this post.


Below is the content of the original post for reference.

=======================================================================

First Post Starts

Hello everyone. It is my first post to the Alteryx community. I start to write the posts because I would like to share the ideas on what I have done and experienced before. Might be there is someone who already applied similar solutions but I think it is good to share and keep improving with everyone in the community.  Let's evolve.


Topic

Nowadays, it is typical scenario that once the Alteryx workflow is completed, Alteryx is able to trigger the subsequent downstream systems to continue the data pipeline. For example, once Alteryx is finished the data preparation for Qlik Sense dashboard, it will trigger the reload of the dashboard.


In order to achieve this, it requires to call the Qlik Sense Repository Service API (https://help.qlik.com/en-US/sense-developer/February2022/Subsystems/RepositoryServiceAPI/Content/Sen...). Normally, we would get to use the Download tool to do so.  However, it does not support to pass the Qlik Sense certificate for authentication purpose.  The passive solution is to calculate the time required for the workflow to be finished and setup the schedule in Qlik Sense that will 100% to pick up the data.  This method is no guarantee because the workflow completion might be affected by a lot of factors like network, server resources, data volume, etc.  More practically, we could then look for the Run Command tool with CURL or postman, or simply write the python code in the Python tool. Either of them requires kind of coding/scripting to make it work.  It is not easy to maintain.


QS Reload Tool

In order to make it seamless for this kind of integration, I have created a QS Reload tool for this purpose.  Once it triggers the QS task and it will return and complete the workflow.  The is way to make it synchronous call, however, it is just a waste of resource to just keep waiting in the workflow without any processing.  The interface looks like below and the configurable parameters are illustrated below.


qs_reload_tool.png

QS Server

This is where the server address would be supplied. The protocol does not need to be specified, only the server’s address


Certificate and Reload Certificate

This would be filled up when the “Reload Certificate” button is clicked. This is designed to get the certificates related to Qlik Client from your certificate store. This certificate would be passed as a header in the Http Request and is designed to make the request secure. Basically, this is also known as SSL or Secure Sockets Layer (SSL) or to encrypt the information sent from the requestor machine to the server machine. For further explanation, see Certificates Section of this document.


Get Task Name

Once the server address and the certificate are supplied with correct information, this button would get all the available tasks inside the Qlik Management Console inside the server.


Task Name

This would be filled with the tasks fetched from the server. This is possible through the use of Qlik Sense’s QRS API. The selected task would have the following format, ApplicationName(applicationID). Also whatever task id is selected in the combo box. It would be the one that would be triggered to start.


Messages

This is to inform the user about warnings, status and errors happening inside the GUI. This is designed to help the end user know what inputs are mandatory and the status if the request to get the task list succeed or failed. 


Keep Connected

I am unable to share the tool at the moment but if you need more information, kindly drop me a message.   Meanwhile, I will continue to share more stuff in the new posts.


=======================================================================


Modernizing to use CURL API 


A lot of people might query because the depreciation of the .NET SDK, it should then come into the Python SDK to continue the development as recommended by Alteryx for SDK.  Why I now provide and discuss the CURL method instead of providing a new Python replacement is because the tool itself is not a supported product and it is really difficult for people and companies to use.   No matter how native is the underlying code is, it is not possible to make it widely available where is regulatory, compliance, security, etc.  Plenty of rules that are not able to overcome.  Even if it can be passed, when Alteryx upgrades, it also faces other compatibility issues.


As a result, nowadays, API would be a more appropriate solution.  API is using widely in the word and it is one of the major method to integrate systems together.   API would be easier to be captured and used for everyone.   And natively, Alteryx has a Command tool that is possible for you to use.   That means you do not need to rely my tool and you can integrate as freely as you can.


OK.  Let's see how to use CURL API.  In fact, previously, I have shared a post before discussing about CURL and Qlik API.  For more detailed understanding of QS API call, please refer to the link below.


https://kongsoncheung.blogspot.com/2023/06/curl-qrs-api.html


To be specific, we now focus on two API methods to trigger the reload of the QS Task including:


  • post /task/{id}/start/synchronous
https://help.qlik.com/en-US/sense-developer/February2022/APIs/RepositoryServiceAPI/index.html?page=1110

This method is to trigger the reload and wait for its completion.  It seldom use and waste of Alteryx worker resource in server environment.  This holds a worker without doing anything until getting a response that the QS task reload is completed. 

  • post /task/{id}/start
https://help.qlik.com/en-US/sense-developer/February2022/APIs/RepositoryServiceAPI/index.html?page=1330

This is to trigger the QS reload task asynchronously, i.e. to trigger and complete.   Since the reload is inside Qlik Sense, if there is any issue, it could be reported from the Qlik Sense monitoring setup.  And more importantly, it can free up the Alteryx worker for other important tasks.


 A sample CURL command is illustrated as below to trigger QS Task asynchronously is as below:

"E:\Qlik Sense API\CURL\bin\curl.exe" -X POST --cert "E:\Qlik Sense API\Certificate\client.pem" --key "E:\Qlik Sense API\Certificate\client_key.pem" --insecure -k "https://[Server FQDN]:4242/qrs/task/[Task_ID]/start/?xrfkey=0123456789abcdef" --header "x-qlik-xrfkey: abcdefgh0123456" --header "X-Qlik-User: UserDirectory=internal;UserId=sa_repository" --header "Content-Type:application.json" --header "Content-Length:0"


The parameters are explained in the following:

-X

It is to specify the HTTP request is using which HTTP method for request.  The API call is required to use POST.


--cert 

The root certificate or the exported certificate from Qlik Sense server.


--key

The root key.  *Please use securely.


--insecure

Just to avoid SSL issue.   It is recommended to remove this if all underlying infrastructure is working fine.


-k "https://[Server FQDN]:4242/qrs/task/[Task_ID]/start/?xrfkey=0123456789abcdef"

To specify the API endpoint like the server address, server port, the QS Reload Task ID.  The xrfkey is to be provided both in the query as well as in the HTTP header.


--header "X-Qlik-User: UserDirectory=internal;UserId=sa_repository"

This is to impersonate the account to execute the reload.  Normally, it should be internal as the user directory and sa_repository as the user ID.


--header "Content-Type:application/json"

To specify the content provided in body is using JSON.   Even no content, we specify as JSON because all QS API is using JSON.


--header "Content-Length:0"

Since this request is a POST and there is not content required, 0 length is provided to the HTTP header.


The remaining is to put the API command into the Alteryx Command tool and let it trigger CURL to call the Qlik Sense Repository Service API.   I don't go into detail this time.  If you need help on it, leave me a message.


Thank you for reading.  I hope it help you.  Just leave a message if you have any discussion/share want to make.


Saturday, May 25, 2024

Tableau - Analytical Calendar Attempt

 Post Index

Analytical Calendar The Story

2024-05-25

Analytical Calendar

Applying in Tableau

How to implement in Tableau

This post is to provide you an idea how to implement Analytical Calendar in Tableau.  Or more directly, it is how I try to put the Analytical Calendar into Tableau for an attempt so that Tableau can also enjoy the simplicity of the analysis and comparison periods as well as the simplified selections to navigate with the time.

In order to implement Analytical Calendar is not straightforward.  It cannot direct plug in and use.   And a few tuning is required and it also requires to understand deeper of Tableau.

In the following, I will share what I have encountered and what I have done.  Let's start!


Differences in Tableau

First of all, the design of tableau is quite different from Power BI and Qlik.  The major difference is that it is query-based.  What it means is that any data required from the data sources, it triggers a query.  It uses joins regarding to the data model.  No matter it is a filter, a measure calculation, etc, it has its own mechanism to get data from the data sources.  Even if it is using Extract, it is still query-based.

This means for Analytical Calendar, it requires a way to facilitate a fast way to retrieve data such that it can reduce the time and resource require to link up the required period data.

Another headache difference is that Tableau is unable to override filters.   Once it has been configured in the worksheet, it does not have any methods to override the filter values.   Tableau has a hierarchy of filtering from Extract, Data Source, Context, Dimension, Measure to Table as illustrated below.

https://www.thedataschool.co.uk/tristan-kelly/different-types-of-filters/


Although you might find LOD to help but it can only ignore dimension in the worksheet dataset.  As a result, it is not freely for you to control "N/A" or the Comparison Perspective as what you want.


New Design to Adapt Tableau

With the limitations or the differences in Tableau, the Analytical Calendar design has to be updated and make a bit different compared to Power BI and Qlik in order to adapt to Tableau.

In the latest version of Analytical Calendar, only three elements are required to be selected including Analysis Perspective, Unique Date and Comparison Perspective and in measures, we did the trick to modify the Comparison Perspective to "N/A" in order to make an analysis period selection.  However, Tableau isn't able to achieve the same.

In Tableau Analytical Calendar design, the three fields are remained but the selection of these three fields are not directly as what you selected.  Instead, each pair of selection will associate together with both Analysis Period and Comparison Period.  This is to overcome the filter limitation in Tableau.  Such that, in the worksheet, you are able to control to show the Analysis Period or the Comparison Period by the additional field called Calendar Control.

The below diagram illustrated an example of the design:


In the example, You are looking for 2024-05-20 (Actual Date) to compare 1 day before.  This selection, in the data model, is associating with two Date Range Key, i.e. Analysis Period and Comparison Period.  In tableau measures, it can control to use Calendar Control = 'ANALYSIS' for analysis period while Calendar Control = 'COMPARISON; for comparison period.  Although it increases the number of rows, because we are only a limited combinations of selection of the Analytical Calendar three core fields, it greatly narrows down the required rows in joining.  Overall, only a little resource is required to compensate the Tableau design limitation.


Tableau Analytical Calendar Template

I have also put the Tableau template in https://github.com/kongson-cheung/analytical-calendar/blob/main/Tableau%20Analytical%20Calendar%20Examples/AnalyticalCalendar6.0_Tableau.twbx.

Please have a try and let me know your comment.


Below are the screen captures of the template.  It does not have nice visual as the focus is to show the usage of Analytical Calendar.

The same layout is developed in Tableau similar to Qlik and Power BI.

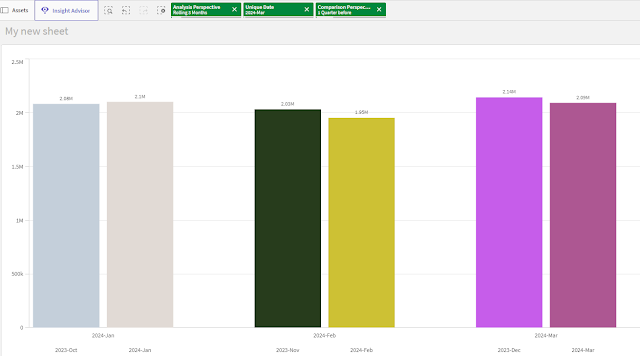
The beauty of Analytical Calendar is that you are free to travel with time on analysis period and its comparison period.  Single presentation can already satisfy YoY, MoM, YTD, etc.


Thank you for reading.  I hope it help.  Leave me message if you have any discussion or want to share your views.


Sunday, May 5, 2024

Qlik Sense Penalty Card

 Post Index

2024-05-05

Qlik Sense Penalty Card

Share Knowledge Share Fun

Performance Tips in Qlik Sense


First of all, thank you for our team to put their effort and passion in developing the cards with fun, with heart and with the knowledge to share about the Qlik Sense best practices.  


You might know some of them but let's see if you know them all.  Performance, in fact, is $$$.  With better performance, the usage of CPU, RAM, Network and Disk is dropped and in the clod era, it saves your pocket.  Take the card wisely and most importantly, have fun with them.


The original post can be found in the Qlik Sense Community.

https://community.qlik.com/t5/New-to-Qlik-Analytics/Qlik-Sense-Penalty-Card/m-p/2448393#M250926

The cards are not perfect but we have put our passion into it.  So, enjoy the cards and have fun together.  Kindly share your views with us and let's continue with it.  Learning should be interesting and fun.

And you can find the penalty cards below.  How much do you know already?


Alteryx Penalty Card

Post Index

2024-05-05

Alteryx Penalty Card

Share Knowledge Share Fun

Performance Tips while using Alteryx Designer


Saturday, April 20, 2024

Analytical Calendar in Google Drive

 Post Index

Analytical Calendar The Story

2024-04-20

Analytical Calendar in Google Drive

Data File Sharing and How to Use

Analytical Calendar (Default Mode) from 2015 to 2024


This post is to provide you a step by step guide on how to integrate the analytical calendar into your analytic dashboard.  The analytical calendar files are now available in Google Drive (Please send me a request and I will share you the files).

The Analytical Calendar consists of the following information:

1. It has calendar information from 2015-01-01 to 2024-12-31.

2. It has date granularity of Year, Quarter, Month, Week and Date.

3. Week is using Complete Week concept.

4. Analysis Perspective include:

    a) For Year

        i) Actual Year

        ii) Rolling 2, 3 Years

    b) For Quarter

        i) Actual Quarter

        ii) Year to Quarter

        iii) Rolling 2, 3 Quarters

    c) For Month

        i) Actual Month

        ii) Year to Month

        iii) Rolling 2 - 11 Months

    d) For Week

        i) Actual Week

        ii) Year to Week

        iii) Rolling 2 - 26 Weeks

    e) For Date

        i) Actual Date

        ii) Year to Date

        iii) Year to Month

        iv) Rolling 2 to 30 Days

5. Unique Date include:

    a) Year from 2015 to 2024

    b) Quarter from 2015-Q1 to 2024-Q4

    c) Month from 2015-Jan to 2024-Dec

    d) Week from 2015-W2 to 2024-W53

    e) Date from 2015-01-01 to 2024-12-31

6. Comparison Perspective include:

    a) N/A

    b) For Year

        i) From 1 to 3 Years before

    c) For Quarter

        i) From 1 to 3 Years before

        ii) From 1 to 3 Quarters before

    d) For Month

        i) From 1 to 3 Years before

        ii) From 1 to 3 Quarters before

        iii) From 1 to 11 Months before

    e) For Week

        i) From 1 to 3 Years before

        ii) From 1 to 26 Weeks before

    f) For Date

        i) From 1 to 3 Years before

        ii) From 1 to 3 Quarters before

        iii) From 1 to 11 Months before

        iv) From 1 to 26 Weeks before

        v) From 1 to 30 Days before

7. It might have more than required calendar information and that can be filtered.  It will be demonstrated how to do.


Step by Step Guide

In Qlik SaaS, create a new application or use the application that you would like to use the Analytical Calendar.  And then go to Data Load Editor to begin.


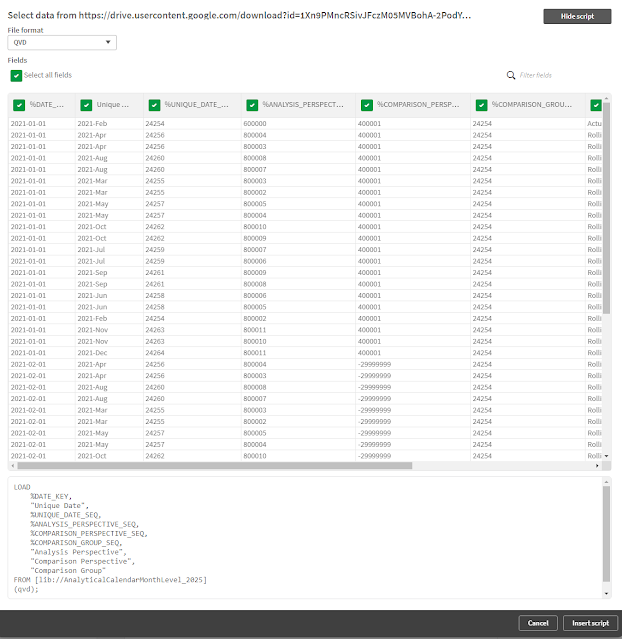
1. Click "Create New Connection".


2. Click "Google Drive".

3. Click "Authenticate".


4. Enter the Gmail account.


5. Enter the password.


6. Click "Continue".


7. Click "Allow".


8. Click "Copy to Clipboard".


9. Paste the link and click "Verify".


10. Update the Name and click "Test Connection".


11. Click "Close".


12. Click "Create".


13. Click the folder icon under the newly created connection.


14. Select the Analytical Calendar file and click "Select".


15. Wait.

16. Do the same for Date Range Linked Table.  Select the file and click "Select". 


17. Do the same for Date Dimension.  Select the file and click "Select". 


18. Modify the script.

a) Add the Table Name.

b) In ANALYTICAL_CALENDAR, add the where clause 

    Where left([Unique Date], 4) >= 'YYYY' (YYYY is between 2015 to 2024)

c) In DATE_RANGE_LINKED_TABLE, add the where clause 

    Where exists(%DATE_RANGE_KEY)

    and [%DATE_KEY] >= 'YYYY-MM-DD' (YYYY-MM-DD is between 2015-01-01 to 2024-12-31)

d) In DATE_DIMENSION, add the where clause 

    Where exists(%DATE_KEY)

All these will eliminate the unnecessary data.


19.  Click "Load Data".


20. Enjoy using the Analytical Calendar !!


Conclusion

It is a no cost sharing.  Very Simple and can let you enjoy the advantages of the Analytical Calendar.   The settings are default and definitely can be customized for specific usage.  If there is a demand, it would later enhance the overall distribution method to really help contribute to the Analytics realm.  For the time being, have a try and let me know if you have any feedback.  The calendar has been developing for quite some time and keep evolving based on the your comments.


Thank you!!  I hope you enjoy the reading and sharing.