Wednesday, July 19, 2023

Qlik Sense Server Migration - API and CURL Detail

Post Index

2023-07-19

How to use CURL and QRS API

Qlik Sense Server Migration Overview


Qlik Sense Server Migration

API and CURL Detail

Migrating Qlik Sense items using APIs

There are a number of QS items required to be migrated in the Qlik Sense server migration process.  This article focuses two core components to illustrate the concept and steps required for migration.  First, it will discuss about the App migration that involves App, App Object and App Content.  Then it will discuss about the Reload Task that involves Reload Task, System Event and Composite Event.

For other, the concept is similar.  I am happy to help if you have questions.


General QRS API Call

More technically, Qlik Sense Server Migration involves a few types of QRS API calls:

1) GET

To obtain the metadata in JSON and this JSON will be modified or trimmed off in order to POST/PUT into the new cloud server.
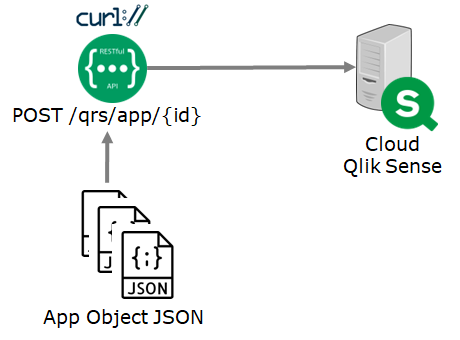
2) POST

POST command is generally to create a new item in the QS server.

3) PUT

PUT command is usually to update the QS item that is already created in the server.


For POST and PUT, usually, it requires details to be provided in the HTTP body.  It would be much easier to GET the metadata directly from the on-premises server and modify the necessary component in the JSON for the POST and PUT APIs.  One obvious example is the modified date and it must be larger than the last modified date.  More related to this article discussion is the app ID.  Since APP ID will be generated after upload, it should maintain a mapping in order to update the JSON for the POST and PUT APIs.


App Object ID vs Engine Object ID

These two IDs are tricky and easy to get confused.  When the app object is created, a unique GUID will be created and this ID is used internally in QS for QMC.  At the same time when the object is created, the Engine Object ID is also created.  It is an in-app unique ID to distinguish the object.  It is for the qvf used.

In the QRS API, app object ID is referring to the App Object ID.  However, in QMC or in the link, it is showing the Engine Object ID.


QS Application Migration

Before migration QS applications, firstly, some QS items should be migrated beforehand.  For instance, data connection, extension, content libraries, stream, etc.  This makes sure the application can make use of all these components.

In fact, to migrate an application, it is similar to do what manually do with the following steps:

1) Export the app with data and cover all the base, shared and private app objects.

2) Import the app with data with all the exported app objects and maintain the ownership

3) Publish the app to stream (if necessary)

4) Unapprove the app object

5) Unpublish the app object

6) Change the owner of the app object to maintain all the ownership


* If app is exported without data, the always one selected value setting in the field will be lost.  If you are certain that the application does not have this setting, it is recommended to export without data and do the reload afterwards.


Export App

There are three methods that are available to obtain the QS app with all the app objects:


1) using QRS API /qrs/app/exportapps (refer to May 2023 version)

This is only available in or above May 2023 version of Qlik Sense.  The export scope should be configured to "all".

2) copy the app directly in the Qlik shared folder, i.e. \\server-name\QlikShare\Apps

This folder contains all the Qlik Sense applications that are in the Qlik Sense server.  The files in this folder are named by the QS Application ID without extension.  These files are actually a binary qvf. 


3) Publish/Approve the sheets and then export the app.

This method has impact to the end users because the private and community app objects will be published and approved to base app objects.   After triggering the export, it can simultaneously unapprove and unpublish the app objects but it still take a while for these operations.  If the server is frozen, this method would be a good choice.


This method requires the following QRS API:

1) PUT /qrs/app/object/{id}/publish

To publish app objects into sharing state.

2) POST /qrs/app/object/{id}/approve

To approve app objects into base state.

3) POST /qrs/app/{id}/export

To create the download link and export the app

4) GET /qrs/download/app/{id}/{exportTicketId}/{fileName}

To download the app based on the download link

5) * if require to restore app object state, POST /qrs/app/object/{id}/unapprove

To unapprove the app objects back to sharing state.

6) * if require to restore app object state, PUT /qrs/app/object/{id}/unpublish

To unpublish the app objects back to private / personal state.


Import App

There are two APIs available for importing the QVF into the Qlik Sense server:

1) POST /qrs/app/import

This requires the qvf first located in the app folder.  C:\ProgramData\Qlik\Sense\App


2) POST /qrs/app/upload

This method is recommended.

Apparently, manual upload is also possible.


Publish App to Stream

The next step is to publish the app into stream with the QRS API.

PUT /qrs/app/{id}/publish

Some of the applications might be in the work stream that does not require this step.


Unapprove App and Change Ownership

This step is a bit tricky because we are not using the unapprove API.  Instead, 

the app object put is used.

PUT /qrs/app/object/{id}

As a result, we can update both the unapprove flag as well as the app object ownership in one-go.


Unpublish App

The last step is to unpublish the app object if they are private/personal.

PUT /qrs/app/object/{id}/unpublish

*** Note if binary QVF is used

The binary qvf files obtain all the app objects even it is deleted (reference).  So, there should be a steps to remove the redundant objects.  This can easily be cross-checked with the app object metadata and do a DELETE /qrs/app/object/{id}.

And there are a few more drawbacks:

The binary qvf files obtain all the app objects even it is deleted (reference).  So, there should be a steps to remove the redundant objects.  This can easily be cross-checked with the app object metadata and do a DELETE /qrs/app/object/{id}.

i) If the application has referenced to the In-App pictures, the link is broken.  One way to fix this is to make sure of the Engine JSON API to replace the on-premises app ID to the cloud app ID.

ii) the app properties are also lost.  This needs to be fixed by PUT /qrs/app/{id}.  Obviously, it requires a JSON that can be obtained by GET /qrs/app/{id}

iii) the app content is lost.  And it requires to POST /qrs/appcontent/{appid}/uploadfile.  The content physical files can be found in \\server-name\QlikShare\Static Content\App Content.

QS Reload Task Migration

The reload task migration is less complicated compared to the app migration.  The only tricky part is to make sure the reload task is pointing to the updated app ID.  And reload task always comes with trigger where

a) Schema event is based on the time schedule.

b) Composite event is used to chain up the app reload.


Overall, the below API calls will be used to obtain the metadata.

GET /qrs/reloadtask/full

GET /qrs/schemaevent/full

GET /qrs/compositeevent/full


The below API call will be used to create the reload task, schema event as well as the compositive event.

POST /qrs/reloadtask

POST /qrs/schemaevent

POST /qrs/compositeevent


Thank you for reading.  I hope you find it useful.  See you in the next post :)


Saturday, July 15, 2023

Qlik Sense Server Migration - API and CURL Overview

Post Index

 2023-07-15

How to use CURL and QRS API


Qlik Sense Server Migration

API and CURL Overview

Migrating Qlik Sense items using APIs

There are a lot of discussions on how to perform a Qlik Sense server migration .  One typical method is to use backup and restore the PostgreSQL database and then update the configuration.  Instead of this traditional method, this article focuses the discussion on how to perform a Qlik Sense migration using QRS API with CURL to move QS items from on-premises servers to cloud servers.

This article provides an overview and provides an understanding about the basics for preparation.  For detailed implementation, it will be discussed in future posts later (will provide the links later when they are ready).  So, let's start.


Qlik Sense Migration Concept

Using QRS API to perform the migration means that the new QS server is first configured in place and then ready to accept the move-over QS items by QRS API.   The new QS server should be readily configured:

    a) Share location (the shared content location)

    b) Node setup (join to the central node cluster)

    c) Service Configuration (Proxy, Engine, Scheduler, etc)


After the new server is ready, in general, the below Qlik Sense items will be involved in the migration

    a) Data Connection

    b) Stream

    c) Extension

    d) Content Libraries

    e) Applications

    f) App Objects (Base/Private, Publish, Approved)

    g) App Content

    h) ODAG Links

    i) Reload Task (including schema event, composite event)

    j) System Rules (including Security Rules, license rules, etc)

    k) more ... (like tag, custom properties and so on), depending on the usage


The above should cover majority of the usage pattern.  More importantly, the QS items have inter-dependencies.  For example, Stream must be ready before an application can be published to it.  The above sequence can be used as a simple sequence for creation for reference.

In addition, all the active users should be synchronized from the user directory before the migration to start in order to preserve the ownership of the QS items.


Migration Control Master

Before migration, it is important to mark down the QS items that are going to be migrated.  The easiest way is to make use of the QRS API to obtain the metadata directly from the Qlik Sense server.  In general, it will be something similar to below, taking app as an example.

1) GET /qrs/app

This provides the condensed details

2) GET /qrs/app/full

This provides the full details.

If taking the aforementioned pattern, the below QRS API calls will be used to extract the metadata:

1) GET /qrs/dataconnection/full

The data connection to be used for loading data source data.

2) GET /qrs/stream/full

The stream that will be used to publish app.

3) GET /qrs/extension/full

The extension used for extra chart types.

4) GET /qrs/contentlibrary/full

The additional libraries to provide picture or media files.

5) GET /qrs/app/full

The QS application.

6) GET /qrs/app/object/full

The app objects including sheet, story, bookmark, etc.

7) GET /qrs/app/content/full

The in-app picture and media files.

8) GET /qrs/odaglink/full

The ODAG link that allows usage.

9) GET /qrs/odaglinkusage/full

The actual usage for the ODAG links.

10) GET /qrs/reloadtask/full

The reload task to trigger data reload in QS application.

11) GET /qrs/schemaevent/full

The reload task trigger by schedule.

12) GET /qrs/compositeevent/full

The reload task trigger by event.

13) GET /qrs/systemrule/full

The rule including security rules, license rules, etc.

14) GET /qrs/license/professionalaccessgroup/full

The group for professional license.

15) GET /qrs/license/analyzeraccessgroup/full

The group for analyzer license.

16) GET /qrs/user

The QS users.


Migration Process Overview

There are a few core steps required in the migration process.  It includes:

1) Extraction

It extracts all the metadata from the on-premises server via QRS API.  The result will be in JSON format and it is then required to convert into Excel as a metadata list.

2) Review

The metadata lists will then be reviewed by administrators to analyze what are required to migrate and what are redundant.  Once this process is done, it becomes control master lists as a control to make sure all items marked "migrate" should be migrated to the new cloud server.

3) Prepare

Once the control master list is ready, it will then help to prepare the generation script for CURL batch file as well as the JSON for migration.  This is tricky and a clear sequence of process is needed.

4) Migration

When all the CURL batches and JSON files are ready, it can then start the migration processes.

5) Verification

Once all items are then migrated to the cloud server, it is required to extract again both the on-premises metadata as well as the cloud metadata in addition to the control master.  They are then matched against each other to make sure items:

1) should be left in on-premises

2) should be migrated to cloud

3) are new to cloud


Advantages of Using API

One difficulty in migrating the Qlik Sense items over to the new servers is to maintain the GUID.  It is required for Qlik Sense to link up all the components internally and work together.  The integrity should be maintained.  If the GUID is changed, it means the corresponding dependent items or references have to be updated.  Otherwise, the relationship is broken, it creates lots of disfunctionality.

If the QS items are created via QMC console, a random GUID will be created.  And a lot of effort is required to match the old/new GUID and it increases the tasks to re-configure all these dependencies.

Fortunately, using QRS API, a majority of the QS items can retain their GUID which can make the migration easier and faster.  Although it is not possible to maintain the application ID (also the Application Object ID, please do not confuse with the Engine Object ID, will explain further during the detailed migration process), it already smoothens the migration process to reduce the changes required.

More discussion will be provided when discussing the migration details.


Thanks for reading and I hope you find it useful.  See you in the next post! :)


Monday, June 19, 2023

Qlik Sense Integration - Qlik Sense Repository Service API

Post Index

2023-06-19


Qlik Sense Integration

Qlik Sense Repository Service (QRS) API

Qlik Sense Repository Service (QRS) API is a very useful API service which allows to perform similar actions like in the QMC console.  For example, it can import app, delete app, publish app and so on.  It can also trigger reload tasks, getting lists of app objects, managing security rules (systemrule), etc.  Basically, it is an interface to communicate with the backend Qlik Sense Repository Service and provides a full set of API calls for Qlik Sense integration and management.

There are two methods to connect to the QRS API.  One is via the proxy with port 443 and the other is directly to the API endpoints with the port 4242.  This article is focusing on the latter method to directly connect to API endpoints with the port 4242.


Pre-requisite

In order to call the QRS API, the following are required:


1. Qlik Sense Certificate

This is used for authentication.  The certificate is similar to an access card to allow to call the QRS API.

* Please keep these files in a safe location.  These files will allow the connection to the Qlik Sense QRS service and perform everything related to repository service!


2. Xrfkey

It is a string with a length of 16 arbitrary character long.  It must provide in both the request parameters and the request header to avoid web vulnerability.  The pair provided must be matched.  The characters can only be number and alphabets, i.e. 0-9, a-z and A-Z.


3. HTTP Client

CURL, postman, some browser extension are typical HTTP clients.  This article will focus on CURL because it is command-line based and can easily be used for integration.


4. Port 4242

It must make sure the port 4242 is not blocked by firewall.  Or to be more secure and specific, you should decide to just allow certain IP to connect to the QRS server with port 4242.


Preparation

Preparation - Getting Qlik Sense Certificate

1. Go to the central node of the Qlik Sense server.

2. Navigate to the path C:\programdata\Qlik\Sense\Repository\Exported Certificates\.Local Certificates

3. Copy client.pem and client_key.pem files into a safe location, say, E:\Qlik Sense API\Certificate


Preparation - Xrfkey

It is easy to have one like abcdEDFGh0123456.  Or you can use dynamic method to generate this character string to enhance the security.


Preparation - HTTP Client

The CURL can be downloaded in the link https://curl.se/download.html.

1. Download the latest version and extract the zip file. Say, E:\Qlik Sense API\CURL

2. We will need to call CURL.exe in the bin folder.  Mark down the entire path, say, E:\Qlik Sense API\CURL\bin\curl.exe.


Preparation - CURL command to call QRS API

"E:\Qlik Sense API\CURL\bin\curl.exe" -X GET --cert "E:\Qlik Sense API\Certificate\client.pem" --key "E:\Qlik Sense API\Certificate\client_key.pem" --insecure -k "https://[Server FQDN]:4242/qrs/app?xrfkey=0123456789abcdef" --header "x-qlik-xrfkey: abcdefgh0123456" --header "X-Qlik-User: UserDirectory=internal;UserId=sa_repository "


Taking an example of the above, the CURL command contains the following elements:

1. The CURL execution file.

"E:\Qlik Sense API\CURL\bin\curl.exe"


2. The HTTP request method used by CURL.  In QRS API, it can be GET, POST, PUT, DELETE.

-X GET


2. The certificate obtained from the Qlik Sense server for authentication purpose.

--cert "E:\Qlik Sense API\Certificate\client.pem" --key "E:\Qlik Sense API\Certificate\client_key.pem" 


3.  If this is specified, it allows self-signed certificate.

--insecure


4. The QRS API endpoint, the example is calling to get a list of app

https://[Server FQDN]:4242/qrs/app


5. The XRFkey in the request parameter.

?xrfkey=0123456789abcdef 


5. The XRFkey header to match with the request parameter

--header "x-qlik-xrfkey: abcdefgh0123456" 


6. Impersonating the account to perform the action.  This account must have adequate privilege to perform the actions.   sa_repository is the Qlik Sense internal account to handle repository related matters.

--header "X-Qlik-User: UserDirectory=internal;UserId=sa_repository"


7. [optional by API endpoint requirement] Sometimes, additional headers are required:

e.g. --header "Content-Type:application/json"

This specifies the request body to be JSON format.


e.g. --header "Content-Type:application/vnd.qlik.sense.app"

This specifies the request body is a binary QVF file.


e.g. --header "Content-Length:0"

This specifies the request body is with no content.


e.g. --data-binary "@[Path_of_upload_file/content]"

It specifies the path of the upload file/content.


Examples to call the QRS API

We are now ready to call the QRS API.  For instance:


1. Getting a list of app

"E:\Qlik Sense API\CURL\bin\curl.exe" -X GET --cert "E:\Qlik Sense API\Certificate\client.pem" --key "E:\Qlik Sense API\Certificate\client_key.pem" --insecure -k "https://[Server FQDN]:4242/qrs/app?xrfkey=0123456789abcdef" --header "x-qlik-xrfkey: abcdefgh0123456" --header "X-Qlik-User: UserDirectory=internal;UserId=sa_repository"


2. Uploading an app

"E:\Qlik Sense API\CURL\bin\curl.exe" - T "E:\Qlik Sense\App\App Name.qvf" -X POST --cert "E:\Qlik Sense API\Certificate\client.pem" --key "E:\Qlik Sense API\Certificate\client_key.pem" --insecure -k "https://[Server FQDN]:4242/qrs/app/upload?xrfkey=0123456789abcdef&name=App%20Name&keepdata=true&excludeconnections=true" --header "x-qlik-xrfkey: abcdefgh0123456" --header "X-Qlik-User: UserDirectory=internal;UserId=sa_repository" --header "Content-Type:application/vnd.qlik.sense.app


Note:

  • -T is to specify to do multipart upload.
  • "E:\Qlik Sense\App\App Name.qvf" is the QVF file location.
  • keepdata=true is to retain the data.
  • excludeconntions=true is to avoid creating the data connection.


3. Change App Owner and Unapprove

"E:\Qlik Sense API\CURL\bin\curl.exe" -X PUT --cert "E:\Qlik Sense API\Certificate\client.pem" --key "E:\Qlik Sense API\Certificate\client_key.pem" --insecure -k "https://[Server FQDN]:4242/qrs/app/[app_id]/object?xrfkey=0123456789abcdef "--header "x-qlik-xrfkey: abcdefgh0123456" --header "X-Qlik-User: UserDirectory=internal;UserId=sa_repository" --header "Content-Type:application/json" --data-binary "@E:\Qlik Sense API\json\appobject_[id].json"

Note:

  • The change owner and unapprove details are inside the json file.  This can be obtained and modified by getting the app/[id]/object/full to get the json and then to change the required details.


Tips

1. the endpoint to be called needs to be URL encoded, e.g. " " (a space) to %20.

2. Calling in batch file.  % needs to be escaped by %%.

3. Majority of JSON required, you can refer to the /full to get an idea of how to build the json content.

4. Refer the API call in the method sections 

https://help.qlik.com/en-US/sense-developer/May2023/APIs/RepositoryServiceAPI/index.html?page=0#Methods

5. Refer the API required JSON (model) in the model section.

https://help.qlik.com/en-US/sense-developer/May2023/APIs/RepositoryServiceAPI/index.html?page=0#Models

6.  If you exporting the details from Qlik Server, it always comes with a GUID and this GUID is an unique identifier to classify the uniqueness of the object.  This GUID, in fact, can be retained when you are using the API to post it back to the server.  Excepting App, App Object, the GUID must be changed. Other objects in the Qlik Sense server, in fact, can be maintained if the JSON has specified it in the API call


API call is very useful for system integration.  For example, to trigger a reload task once the data is ready.  The upstream system can send a QRS API to trigger the reload.  Other useful example would be server migration.  All the details can be obtained by the QRS API and these details can simply post back to the new server.  This can also enhance durability of the server since the redundant content can be scanned and ignored during the processes.


I hope you find it useful!  See you in the next post :-) !


Tuesday, May 16, 2023

Analytical Calendar - 009 - Analytical Calendar Implementation

Post Index

 Analytical Calendar The Story | The Index Page

2023-05-16


Analytical Calendar

Analytical Calendar Implementation

The above illustrates the data model for Analytical Calendar. Technically, there are 3 tables in the design including “Analytical Calendar”, “Date Range Association” and “Custom Date”.

1.        Analytical Calendar

It is a combination of the analysis calendar and the comparison calendar. A calendar type is used to distinguish which calendar.

Analysis calendar supports all the date range selection with the date range type like Actual, YTD, MTD, YTW, Rolling, etc. The date period is directly picked by users for analysis.

Comparison calendar mainly is for date comparison. In addition to the selection related to the analysis calendar, i.e. date range type, unique date and rolling range, further selection on comparison unit and comparison range to define the comparison period.

Comparison calendar also integrates the custom date. Whatever it is selected in the analytical calendar, i.e. date range type, unique date and rolling range, a custom date is available to be selected. Once custom date is selected, the comparison unit becomes “Custom”.

User is free to select all these calendar fields while in the backend, there is a control to make sure which calendar to take effect.

2.       Custom Date

This is a table containing all the dates available in the dataset. The main function is to allow the custom date range selection.

3.       Date Range Association

It consists of all the date associations that links up to the analytical calendar to the fact table by using the association of Date Key. It uses the compression method discussed in previous section.


Data Model Working Principles

The working principle of analytical calendar is simple because it only requires picking which calendar to use, i.e. analysis calendar and comparison calendar. To be more precise, comparison calendar can be separated into comparison calendar and comparison calendar – custom.

In the analytical calendar, there are three calendar datasets including analysis calendar, comparison calendar and comparison calendar – custom.

The fields in the analytical calendar include:

·         Key fields:

o    %CUSTOM_KEY

It is used to link up the custom calendar. No matter which fields are selected in the analytical calendar, it can allow any custom dates to be selected.


o    %DATE_RANGE_KEY

It is the key to associate the relevant dates based on the analytical calendar design. For analysis calendar, once a combination of date range type, unique date and rolling range are selected, it will associate with meaningful period for analysis. For comparison calendar, in additional the fields required in analysis calendar, additionally, it requires comparison unit and comparison range. If comparison unit is custom, it needs the custom date to be selected in the custom date table.


·         For user selection to control the calendars:

o    Date Range Type

To select which date granularity and also the date range representation.


o    Unique Date

To select the unique date, i.e. 2022 (Year), 2022-01 (Month), 2022-01-01 (Date), etc.


o    Rolling Range

To select when Date Range Type is rolling. It ranges from 1 to the maximum number of rolling. If date range type is not rolling, it shows N/A.


o    Comparison Unit

To select the comparison unit for comparison period. It is either one of the date granularities including Y, Q, M, W, D.  The integrity is already controlled when building up the comparison calendar. In other words, it would not allow Y-Actual 2022 to have a comparison unit of M, for example.


o    Comparison Range

To select the comparison range for the comparison period. It starts from 1 to the maximal allowed period.


·         Sequence fields:

o    %UNIQUE_DATE_SEQ

The unique date sequence is to sort the order of the unique date.


o    %DATE_RANGE_TYPE_SEQ

The date range type sequence is to sort the order of the date range type. So, all with same date granularity can be grouped together and based on the user preference to show the preferred order of the date ranges.


·         Calendar selection:

o    %CALENDAR_TYPE

It has two values including ANALYSIS to indicate analysis calendar and COMPARISON to indicate comparison calendar.


Analysis calendar data sample is as illustrated below. It takes effect on the fields of:

1.        Date Range Type

2.       Unique Date

3.       Rolling Range

4.      %CALENDAR_TYPE = ‘ANALYSIS’


Comparison calendar data sample is illustrated below. It takes effect on the fields of:

1.        Date Range Type

2.       Unique Date

3.       Rolling Range

4.      Comparison Unit

5.       Comparison Range

6.       %CALENDAR_TYPE = ‘COMPARISON’


Comparison Calendar – Custom data sample is illustrated below. It takes effect on the fields of:

1.        Date Range Type

2.       Unique Date

3.       Rolling Range

4.      Comparison Unit = ‘CUSTOM’

5.       %CALENDAR_TYPE = ‘COMPARISON’

6.       Custom Date


Dashboard Development Principles

The Qlik associative data model already pre-calculates all the associations required for the calendar usage. For front-end dashboard development, it is required to control which calendar, i.e. analysis calendar or comparison calendar, takes the effect. In order to do that, there are two variables created:

·         vSetAnalysisAnalysisCalendar

The set analysis below helps to control the usage of the analysis calendar.


[%CALENDAR_TYPE] = {'ANALYSIS'},

[Comparison Range] =,

[Comparison Unit] =


·         vSetAnalysisComparisonCalendar

The set analysis below helps to control the usage of the comparison calendar.


[%CALENDAR_TYPE] = {'COMPARISON'}

$(=if(GetSelectedCount([Custom Date])>0, ',[Unique Date]={' & Concat(chr(39) & [Custom Date] & chr(39), ',') & '}', ''))


For a chart requires to show the analysis period, it will have an expression similar to below.

Sum({< $(vSetAnalysisAnalysisCalendar) >} Exp1)


For a chart requires to show the comparison period, it will have an expression similar to below.

Sum( {<$(vSetAnalysisComparisonCalendar)>} Exp1)


For instance, if the below fields are selected,


The corresponding results will be like below.


And the corresponding period textbox will show as below.


Dashboard Design Advantages

Using the analytical calendar, it gains the below benefits:

User Perspective

·         The dashboard is easier to understand with respect to analysis period and comparison period. It follows 100% of green-white-grey design.

·         Reduce the ambiguity in date selection and chart presentation.

·         The concept is new to the user, but it is easy to pick up and understand. Less than 10 selection attempts, user is able to pick how to use.

Developer Perspective

·         It is a generic design and able to be re-used in many dashboards.

·         It reduces the complexity of the dashboard development to write very complicated set analysis and expression.

·         No need to consider conditions of selection against the chart behavior. It follows the design to show analysis period or comparison period.

·         The design allows customization to add in more date range type.


Previous Section <== 008 - Analytical Calendar - Analytical Calendar Design